¶ Step-By-Step Online League Setup
You've created your league file, and got a long message with a bunch of login and password info. What's next?
¶ StatsPlus Login
First, log in to the StatsPlus website, and request to be added as an admin. More admins can be added on request at any time.
Right after logging in as admin would be a good time to send your initial payment.
¶ OOTP Online League FTP Settings
The next step is to set up OOTP to be able to connect to the server to be able to transfer your league file, team exports, and OOTP reports.
For StatsPlus, you've received the information needed to fill out all the fields on the Online League FTP Settings dialog, except the e-mail settings, where you need to use your own e-mail. Get to the settings like this:
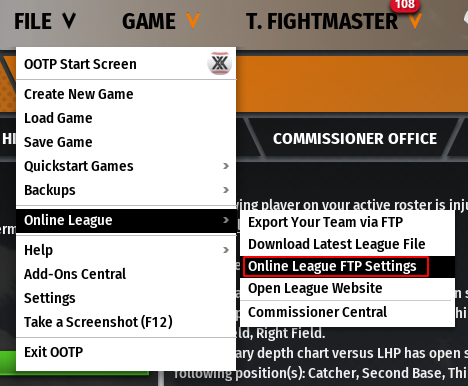
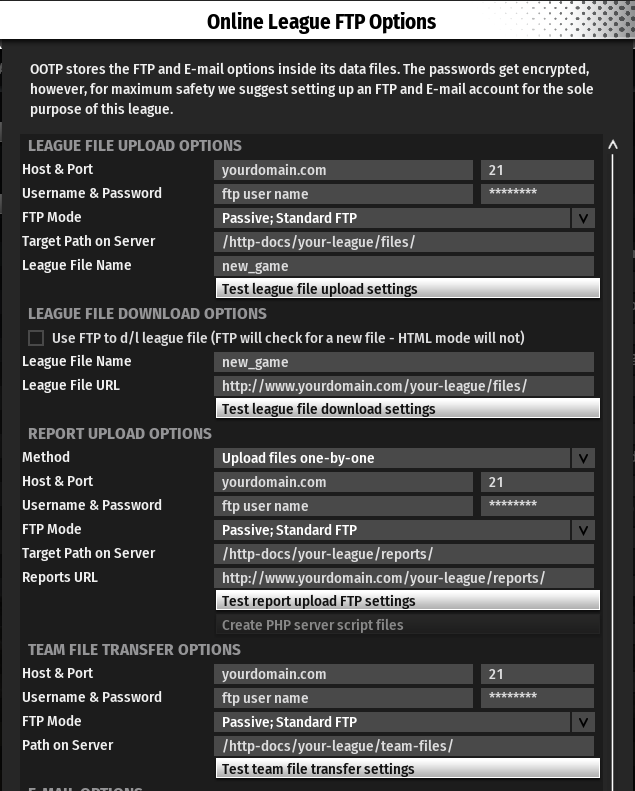
After the dialog opens fill out all the sections with the information provided, and be sure to verify the Test works in each of the four upload/download sections. The default settings look as below, but each box should be checked against the provided settings.
¶ Upload the League File and Reports
Once you have tested each section, then move on to uploading the initial league file and reports to the server. You'll need to upload the league file once for your league members to be able to download it. In other words, Quick Start E-Mail won't work until you upload the file once.
The easiest way to upload the League File and Reports is to use the Automator, aka Commissioner's Office:

For the first upload, make sure only two boxes are checked, "Create & Upload League File", and "Create & Upload HTML Reports", as shown here:
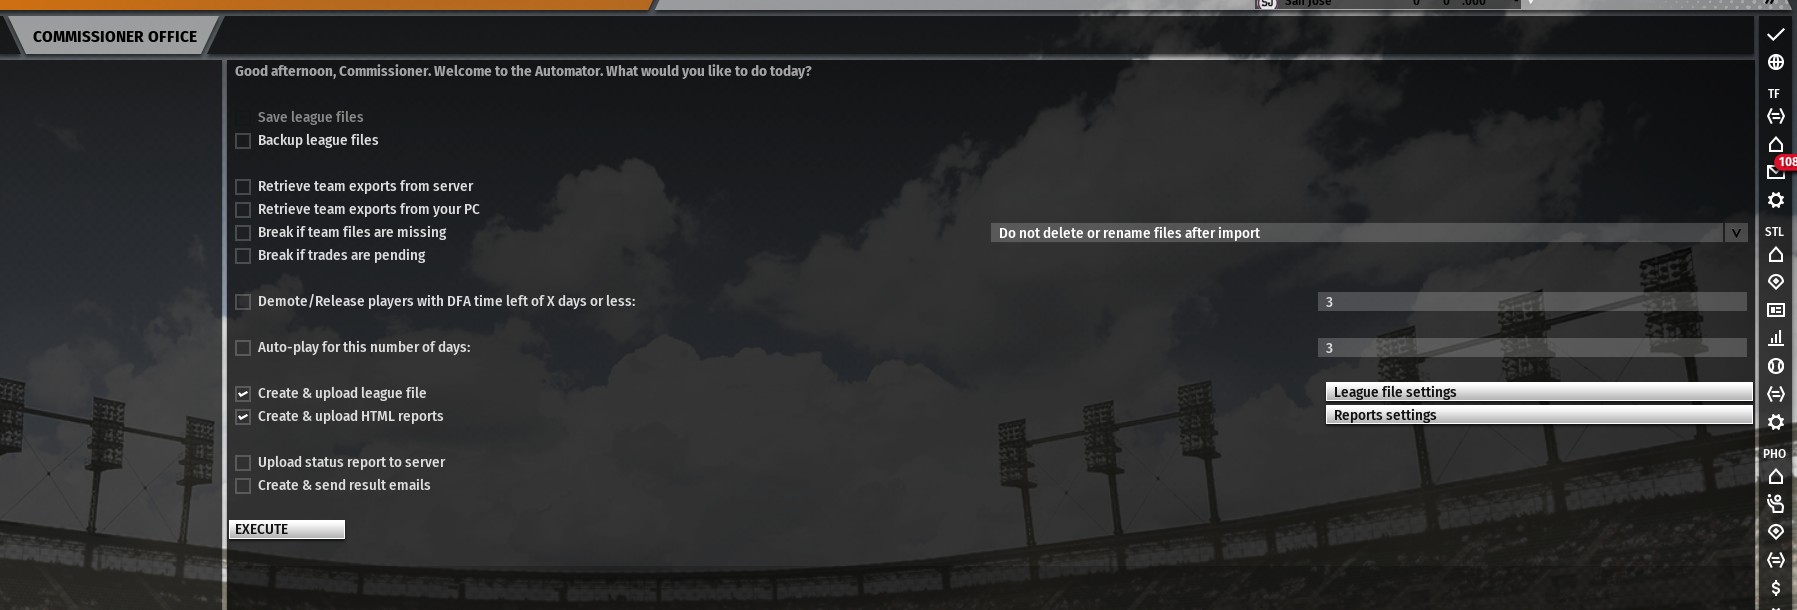
Before clicking "Execute", check the League File Settings and Reports Settings on the right side of the Automator panel.
¶ League File Settings in Automator
First, League File Settings should look like below. Recommend to set the box scores, game logs, and replay files to cover at least two sims worth of games. If your league is 3 game sims, then use 7. If your league is 7 game sims, use 14.
For "Messages from Past X days", recommended setting is 0. If you don't do that, GMs that miss downloads will miss messages. This is not a big contributor to file size.
Also, always check the boxes to include names.dat and retired.dat, and for a better overall experience for your GMs with images, check the box to include new and changed images, too.

¶ Report Settings in Automator
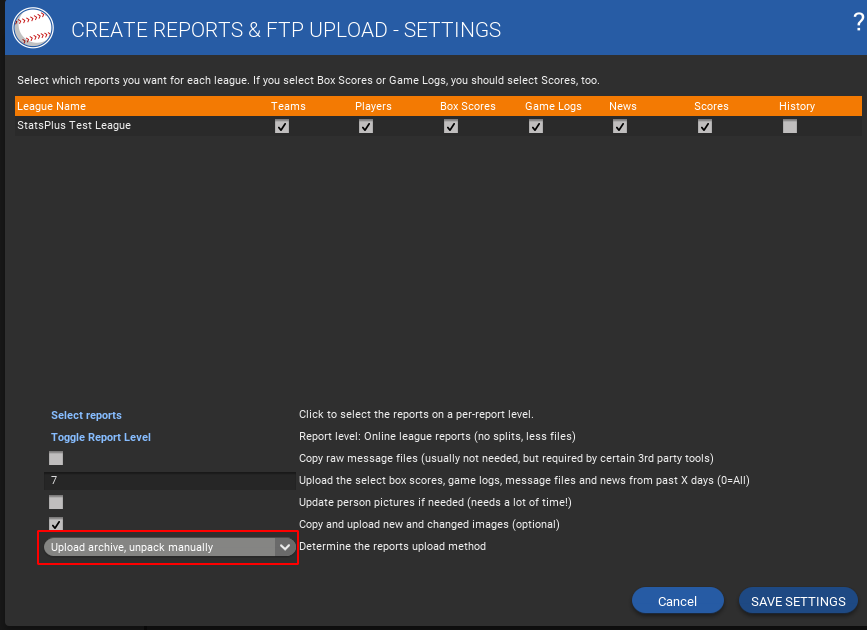
The Reports Settings should look similar to the following. Checking History is something recommended to do once or a couple times a year. Keeping History unchecked most of the time will make reports smaller, and take less time to create. The last box for the upload method is most important for S+ hosting.
¶ Execute!
After you've set up the league file and report settings, hit Execute on the Automator to get the first upload done of each.
¶ Quick-Start E-Mail
The easiest way to get your new GMs going with the league file is to use the OOTP quick-start e-mail option.
Start at the Add/Edit Human Managers dialog:
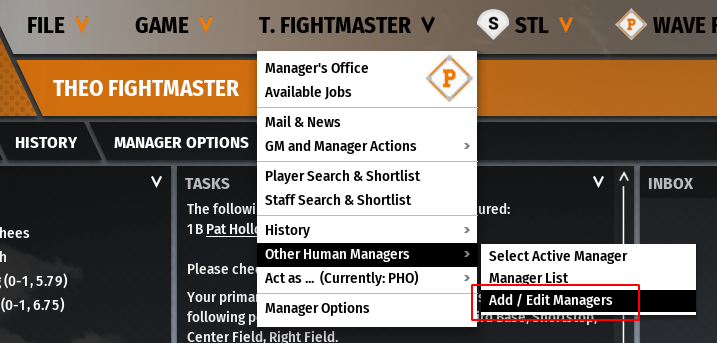
Add each GM as needed, then choose the "Create quick-start email" option:
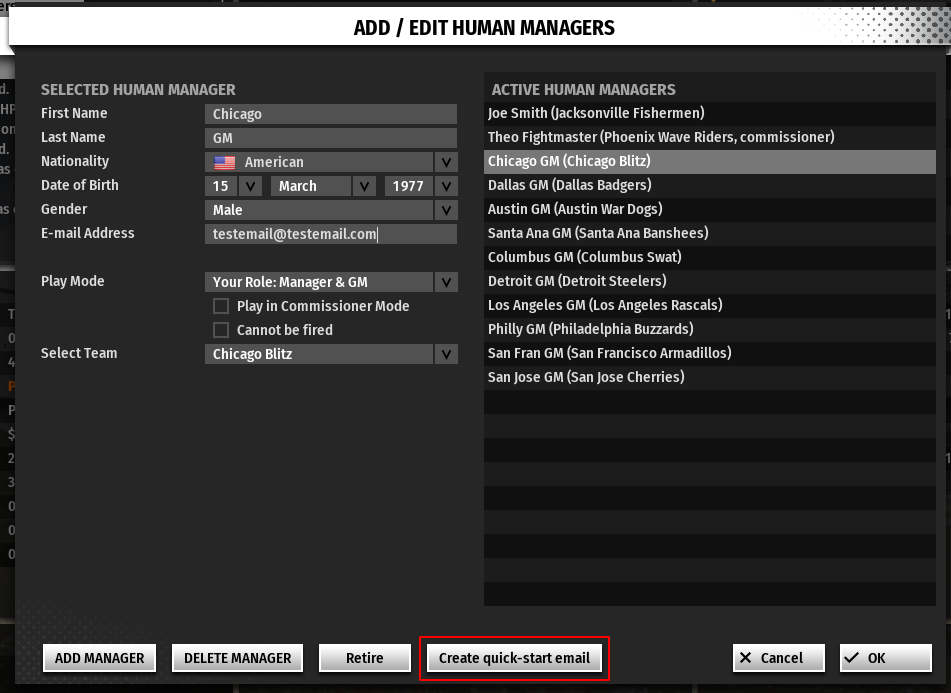
Choose that option, it should bring up your e-mail client with a pre-formatted message. The GM gets the e-mail, copies the content to clipboard on PC, and then uses the Quick Join Online League option on the Start Screen of OOTP, here:

Using this method, OOTP will create the proper accountsdata_gms.dat file, and download the current league file from the server.
GMs can then log in, make changes, and try exporting.